Thursday 14 April 2011

My Final James Bond Trailer

In this blog post, I am going to describe how I made my finished James Bond Trailer. 

Firstly, I took all of the videos that I rendered using 3D Studio Max (ensuring that they were in uncompressed AVI format and of a suitable size) and I tried to import them into a media editor. As a class, we were advised to use Adobe Premiere Pro, however, my computer does not have a high enough specification in order to install Premiere Pro let alone run anything on it, therefore I had to use Windows Movie Maker. It was a compromise but I still managed to produce, in my opinion, an effective trailer which displayed my modelling and animation skills obtained over the past 12 week period. 

I downloaded a free James Bond sound track from the Internet and adjusted it using Audacity: 


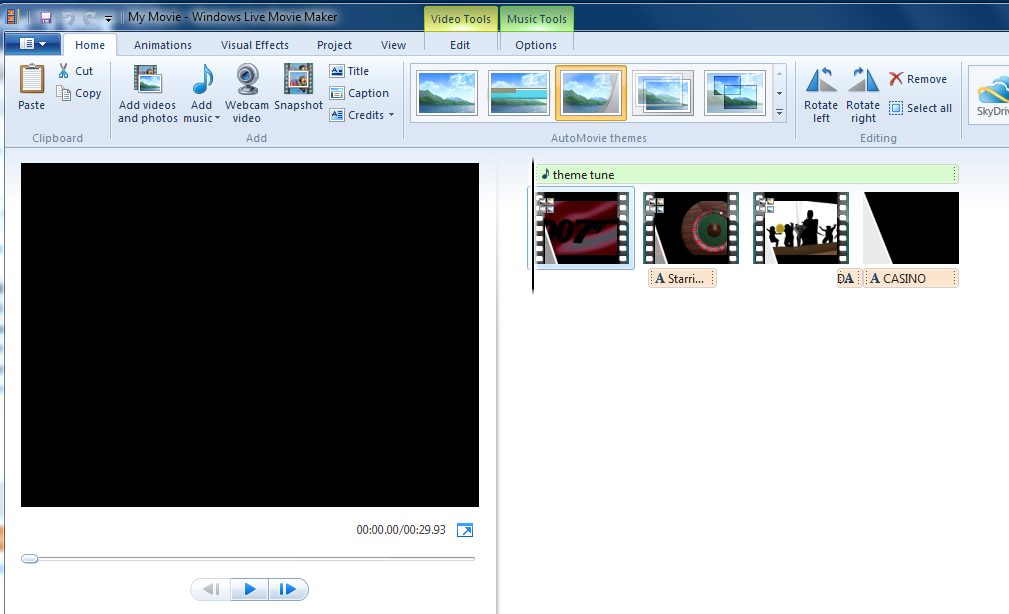
I made the sequence 30 seconds long and added a fade out towards the end of the track, signalling the end of the trailer. This was then imported into Movie Maker along with the 3D renders: 


I then added some cinematic effects and some credits to my video, before exporting it: 


This is my final, finished trailer: 


Animating cameras

This exercise was completed in a tutorial previously but for some reason, it was not uploaded onto my blog.

Anyway, expanding on the previous session about cameras in the first 6 weeks of this module, cameras can be manipulated so that they can follow a path. This may be useful in my final rendering because some scenes may require an object being tracked in order to give the best visual effect.

This is a video showing the moving camera moving around objects:

Animating my models - Silhouette

In order to increase my knowledge base, I asked my tutor how to improve my final scene to show off more animation techniques. He advised me to incorporate the biped tool instead of using the bone tool and to research videos on the internet to help me understand how to make it work.

The first thing I did was create and turbo-smooth a human mesh. Next, I created a bi-ped that was roughly the same size as the mesh I had created (see image below):


The next step was to move the bi-ped in the centre of the mesh and increase the bone sizes so that the skeleton fills up the majority of the mesh, giving the most realistic human movement. To make this easier, I made the mesh see-through and froze it into position so that it did not move. In the image below, you will see the bi-ped correctly positioned inside the mesh: 


Now, I had to envelope a skin around the bi-ped and mesh so that the 2 worked together as 1. Now, when I moved my mesh, the bi-ped moved too, creating realistic movements: 


After creating a bar stool using a series of cylinders and creating a bar area to put the martini glass model on, I decided to show my model walking towards the bar and sitting down on the bar stool. To achieve this, I used the foot step tool to create a path for the model to follow. Then, using tween and A LOT of time and patience, I managed to get my model to sit down correctly: 


In order to make final adjustments to my model, I unfroze him and made sure he was not see-through. I modified the envelope. I found this part fairly tricky, however, it produced a fairly decent result in the end. I then added a plain black material to him to make him look like a silhouette.  

After adding an appropriate background environment and lighting, the scene was completed:

Animating my models - Martini Glass

The next model which I decided to animate was my martini glass:


Using Set Key, I created an animation which moved all of the components in the right place. I wanted to create an animation of the martini being poured into the glass. Because it is impossible to make liquid substances using 3D Studio Max, it meant that I had to improvise by adjusting a cylinder using Edit Poly. With soft selection on, it allowed me to make an object which looks similar to a liquid being poured:


With the pouring part sorted, I needed a method of making it look as if the martini glass was filling up so, using a technique similar to in my other models, i placed an upside down cone into the martini glass which is the same colour and material was the liquid being poured. Then, as the timeline progresses, the cylinder will get bigger until the glass is full and the liquid will move back upwards, creating the illusion that the martini has stopped being poured.


As a finishing touch to the liquid effect, I animated the olive so that it appeared to "plop" into the glass and float up and down inside the glass, as if it was floating in liquid: 


As the tutorials were progressing in class, we learnt how to use the Reactor modifier in order to animate objects falling in a scene by giving it mass, friction and elasticity. I felt it would be a good idea to use that knowledge in this model by creating ice cubes from a box, adding the appropriate material and then cloning them so that they're all the same. The Melt modifier was then used to give them a slightly different shape from each other which would have a slight effect on the Reactor modifier and how the cubes will bounce into the glass. I had to make sure when I was using the modifier that the glass was a concave mesh, otherwise the cubes will treat the glass as convex and will not go into the glass: 


 This is the finished image of the glass:


I have decided to use this as an element in the final trailer and I will try and utilise other skills I have learnt and investigate new techniques to improve my final grade. 

Animating my models - Roulette Table

The next model that I animated was the roulette table. In the images below, you will see the path that was created for the roulette ball to go round the table in a circle. This was created using the circle tool and then applying a path to the ball. The good thing about doing this is that the line itself does not render, just the ball follows the path.


At the same time as the ball rotating, the numbers also rotate in the opposite direction, making the roulette table look more realistic. 

In my storyboard, I wanted to create a transition effect between the 2nd and 3rd scenes using playing cards. I managed to accomplish this by creating 3 planes and adding a material to them. The material was then adjusted to fit the cards properly: 


The cards were then imported into my roulette scene and were organised so that after about 200 frames into the animation, they would appear on screen. My original idea was for them to turn over and then pass off the screen but I found it very difficult to find a suitable material to cover the backs of the cards. So instead, I flick the cards off in different directions over a 100 frame period. Similarly to my logo animation, I could not just make certain elements of the animation appear and disappear, so when the cards cover the roulette table and ball, the roulette table is reduced to a size so small that you cannot see it anymore. I also wanted to include credits on this scene but I felt it would be better to wait until I made the final trailer before I added them. 


Here is the timeline of my finished roulette scene: 


Finally, the video below shows my final roulette scene before it has been adjusted using the media editing software: 


Animating my models - Logo

The model which I decided to animate first was my logo from the first scene on my storyboard. The reason why I chose this one first was because it required the simplest of the techniques I have learnt over the past few weeks. I used the auto-key technique and I rotated my logo so that it spun around over 250 frames. Then, I created some bullet holes like in my storyboard, by using Adobe Illustrator to make the template and then importing and extruding it in Adobe Illustrator. The image below shows the template which was extruded 3 times:


The image below shows the 3 bullet holes next to the logo. A material was added in order to make them look more metallic like and then they were squeezed, bent and melted in order to form a more realistic shape:


The bullet holes were then animated so that they appeared on screen after the logo has stopped rotating. Because of the limitations of the software, it meant that the bullet holes could not just appear, they always had to be in the scene. In order to combat this, I had to make the bullet holes so small that you could not see them to start with and then increased their size when I wanted them to appear. In fact, this gave a more realistic action so it was an improvement to my initial idea. 

In my storyboard, I wanted blood to leak into the scene from the bullet holes, however due to time constraints, it has meant that I did not have time to implement this. This meant that I had to find a different way of transitioning from the first scene to the second scene which was not accomplished in 3D Studio Max but in the media editor instead. 

The image below shows the tween timeline of my logo animation:


Finally, the video below shows my finished first scene: 

Tuesday 29 March 2011

Tutorial 4 - Using Reactor

In this tutorial, we had to learn how to use Rigid Body Collections and Soft Body Collections in order to create an animation. The example we were given to start off with involved two blocks, with one block colliding on another. Reacto allows you to modify the gravity of the object and control how an object falls during an animation. There are three different modifiers which can create difference effects; mass, friction and elasticity. The mass of an object controls the amount of gravity that the object has. The friction controls the amount of kinetic energy which passes between the objects. The elasticity of an object gives the object a bounce appearance. After adjusting this options, the video below is my finished result for this part of the tutorial:


Next, we had to apply this knowledge in order to create a realistic bowling alley. The objects were imported into 3D Studio Max and a collection was created. All of the objects within the scene were added to this collection. The blue symbol indicates the collection however when the animation is rendered, this is not displayed onscreen.


The mass of the ball and the pins was adjusted. Then, using autokey, I moved the ball forwards over 5 frames. To add a more realistic effect to the movement of the ball, I slightly rotated it during this 5 frame period to give it spin.

After applying materials to the objects, creating the animation and then rendering it, the video below is my final result: